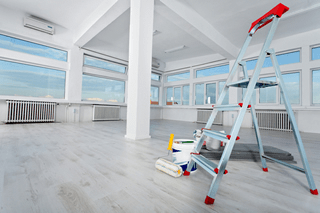
After finishing an office renovation project, you’re ready to sit back and enjoy your new space, right? Not so fast. Before you can kick up your feet, you need to complete a post-construction cleaning marathon.
Don’t let layers of dust leave your freshly renovated office looking old and dingy. Strap on a protective mask and use this handy post-construction cleaning checklist to put the finishing touches on your beautiful new space.
Post-Construction Cleaning Checklist
1. Vacuum Carpets & Upholstery
It’s all too easy for dust and dirt particles to embed themselves in curtains, upholstered furniture and carpeted floors. If allowed to settle after construction, the result can not only look filthy, but also cause itchy, irritating reactions for friends, family or guests.
Vacuum all soft surfaces, paying close attention to the details. Remove and vacuum each furniture cushion, and the underlying frames. Try vacuuming twice if you feel any residual dust after the first round.
2. Wipe Down Hard Surfaces
Clean surfaces from the top down. Start by wiping the dust off your walls – yes, even your walls collect dust during construction. Dry dusting is the safest way to remove the particles without damaging a wall’s surface, but a damp cloth can also be used depending on your type of paint or wall covering. Refer to the paint or wallpaper manufacturer before using any moisture, and test a small area before proceeding.
Moldings and cabinets are another favorite resting spot for dust particles. Take a duster to these areas next. Clean the interior shelves of all cabinets, paying special attention to those hard-to-reach corners. Wipe off countertops and any other flat surfaces before tackling the dirt and debris that’s on or near the floor. Then, sweep out any visible dust, and mop your hard floors from wall to wall.
3. Clean Air Vents & Replace Filters
In a large home renovation project means, dust and debris will mingle with the air itself, making its way to your vents. Even if you only renovated one part of your home, treating the air vents and filters in that space is critical to reduce the amount of dust that can spread through the rest of your home.
Remove the vent covers from the surrounding walls and ceilings, clean each one with soap and warm water, and let them dry thoroughly. Replace any exposed air filters with fresh ones before replacing the vent covers. Breathing dusty air can lead to allergies and respiratory issues, so remember not to skip this step!
4. Don’t Forget About the Little Things
Clean any other furniture or items in the renovation zone for a fully dust-free living space. Here’s a quick list of commonly overlooked areas:
- Ceiling fan blades
- Light fixtures
- Lamp shades
- Electronics
- Small appliances
- Decorative items
We don’t blame you if you don’t want to deal with the mess after a disruptive renovation process. If that’s the case, call PIC Maintenance, Inc. Our expert cleaning crews are available 24/7/365 to come over and do the post-construction cleaning for you – quickly, safely and effectively. Soon, you’ll be relaxing in your little slice of paradise with the chaotic memories of renovation behind you and a bright, clean future ahead.


